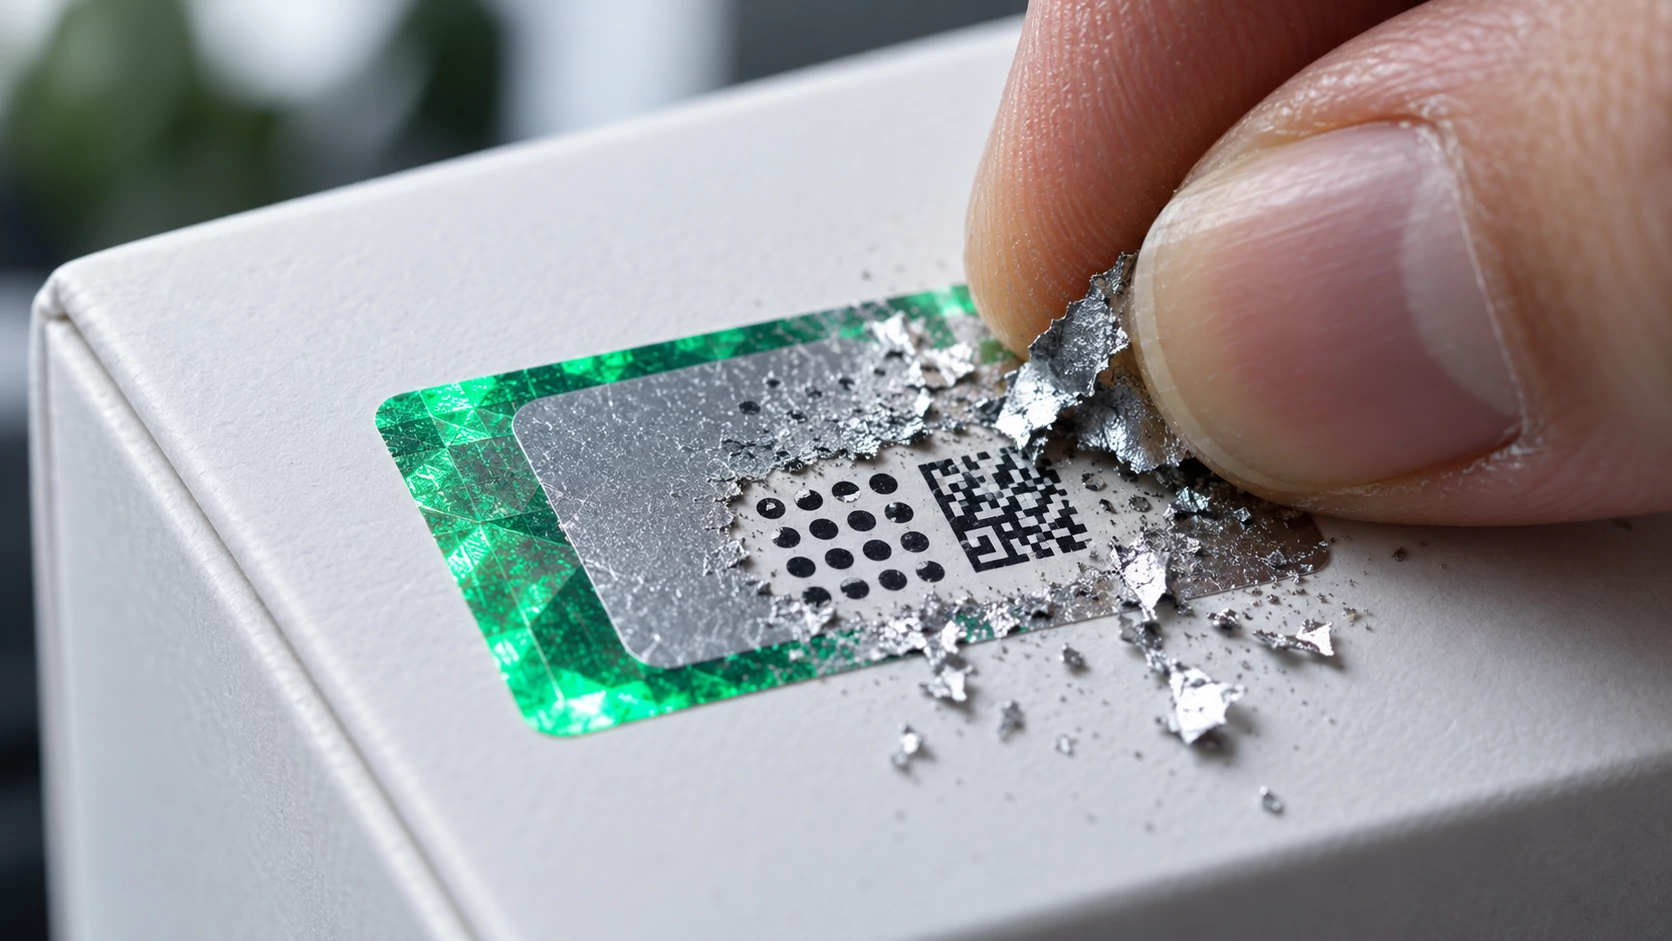
Applying Security Labels to Packaging: A Pre-Production Field Guide
Applying a security label to packaging should be validated on the actual product before labels are committed to a production run. Adhesion, protection of the opening point, QR readability, and delivery of an intact concealed PIN all need to succeed in the same pilot.
A label that performs well on a desk sample may behave differently around dust, varnish, curved packs, cold storage, or production-line handling. Approval should therefore rest on evidence from intended use, not only on artwork or a supplier's demonstration sample.
This guide gives brand, quality, manufacturing, and procurement teams one path from sample to controlled rollout. It does not present one label construction as universally suitable. It shows how to select and validate an application for the product, package, and authentication journey.
Short answer: Design the security label with the package
A security label can carry product identity, make interference visible, or let a customer start an authentication check. A dependable application combines the facestock, adhesive, location, print, code management, and user instruction instead of treating the sticker as an isolated purchase.
The label alone cannot prove authenticity with certainty. A physical element becomes part of an authentication system when its unique code is matched to brand records, concealed information is protected, repeat use is monitored, and suspicious events have an investigation path.
- Material and adhesive suited to the finished surface
- Placement that exposes an opening or removal attempt
- A QR code that phones can scan reliably
- Short, unambiguous instructions for the customer
- A code lifecycle that production and quality teams can control
1. Define the event you need to expose
Start with “What must we see when a particular event occurs?” rather than “Which label should we buy?” Opening a carton, moving a label to another pack, copying a QR image, and presenting a valid code in several places are different risks.
A tamper-indicating strip may reveal interference at a closure, yet it cannot identify a copied digital identity by itself. A visible QR code can take a customer to a check, but the image can be copied. Concealed information such as a scratch-off PIN makes remote copying harder for someone who has never handled the label.
Write the risk as an observable statement. “Opening and reclosing the flap must leave a visible change” and “A second use of the same code must create a different result for the customer and brand team” connect design choices to pilot cases.
2. Learn how the finished package surface behaves
Paperboard, varnished board, flexible film, glass, metal, and different plastics do not produce the same result with one adhesive. Texture, curvature, coating, surface energy, and residue can affect the bond. Test the finished surface from the actual packaging supply chain, not merely a generic material description.
Select the adhesive with a finished packaging sample and the material maker's technical application guidance. Add surface residue, application pressure, and the time required for the bond to develop to the pilot record. Do not assume one cleaning procedure is suitable for every label and package.
Do not evaluate samples only on a clean office bench. Include relevant exposure such as filling moisture, cold storage, shipping abrasion, a sunlit shelf, product leakage, and the way a customer opens the pack. Teams responsible for regulated, food-contact, cosmetic, or chemical packaging should separately confirm that any surface treatment fits their applicable requirements.
3. Resolve closure protection and scan placement together
The label must cross the opening point it is meant to protect. A strip positioned near a flap but not across its joint may look intact while the carton is opened. A severe corner can create constant stress that lifts the label before a customer receives the product.
A fold, seam, crowded graphic, reflective patch, or strong curve can make QR scanning harder. The GS1 General Specifications connect barcode placement with package type, scan environment, printing process, and curvature. A security QR may have a different purpose from a retail barcode, but the physical readability discipline is still useful.
Review the location on front, back, and opened-package drawings. Confirm that the label does not hide required product information, a date, batch identifier, or retail barcode. When the package artwork or structure changes, do not transfer the old position without a new assessment.
4. Test the QR code, scratch-off PIN, and instruction as one task
A customer should immediately understand what to find and what to do next. If the QR remains visible while the PIN is concealed until after purchase, the scratch layer must survive transport and shelf handling but still open with reasonable effort.
Do not finish phone testing with one device. Observe scanning across different cameras, lighting conditions, holding angles, and screen instructions. The current GS1 2D barcode implementation guideline stresses testing the package, print, substrate, and intended scanning environment together, with verification repeated after relevant production changes.
- Find and scan the QR code in a normal shelf interaction.
- Open the scratch area without damaging the package.
- Enter the PIN and observe error recovery.
- Run valid-code, invalid-PIN, and repeat-use cases separately.
- Note every point where a new user needs help, then simplify the pack instruction.
Teaching the test group the “correct” path before observation can hide usability failures. First watch people who have not seen the package interpret the label. Then give them process context and verify the technical outcomes separately.
5. Connect the application point to line control
When and by whom a label is applied matters as much as the digital code. Assign ownership for printing, receipt, storage, line feeding, application, and scrap. If unused or damaged labels are not reconciled, physical inventory can drift away from the system record.
Manual application can create skew, wrinkles, and product-code mismatches. Automatic application can introduce feed, sensor, and speed failures. Run the pilot at the intended production condition instead of approving only perfect samples prepared while the line is stopped.
A quality gate should confirm more than label presence. It should connect product-code matching, QR readability, PIN integrity, placement tolerance, and the code's system status. Define how a failed pack leaves the line and whether its code can ever be returned to use.
6. Turn the pre-production pilot into evidence
Select one product family, a real packaging batch, and representative production conditions. Do not invent a universal sample count. Size the exercise to cover the surfaces, shifts, handling paths, and negative cases being compared. Each outcome should be traceable to a photo, code event, and accountable decision.
An Avery Dennison technical bulletin on tamper-evident materials recommends testing in the actual application and notes that substrate composition, texture, cleanliness, temperature, and dwell time can affect the result. A supplier sample is therefore not a completed acceptance test for your packaging.
Record failure modes as carefully as successful samples. Did an edge lift? Did removal produce the intended evidence? Did abrasion damage the QR? Did scratching make the PIN unreadable? Was a product-code mismatch stopped? Production approval should answer these questions with owned evidence.
A concise release checklist
Each team should make its approval visible. Design owns information hierarchy, manufacturing owns repeatable application, quality owns inspection and nonconformance, IT owns code state, and the brand team owns the customer journey. One generic signature saying “label approved” conceals these separate responsibilities.
- The label remained bonded to the actual pack for the intended conditions.
- Opening, removal, and reapplication attempts produced the expected evidence.
- The QR could be read on target phones and in relevant lighting.
- The PIN stayed concealed in distribution and remained legible when opened.
- Valid, invalid, and repeated-code journeys produced the expected result.
- Failed labels, scrapped codes, and rework followed a recorded process.
Add the expected evidence type beside every criterion: photograph, scan record, system event, quality form, or operator observation. If a field problem appears later, the team can revisit both the product and the evidence behind the release decision.
How can xBarkod be evaluated in the application pilot?
The xBarkod product authentication solution supports a unique QR code and concealed PIN for each item, checks whether a code has been used before, and records authentication activity for the company panel. Because its security labels can be added to existing packaging, evaluation can take place on the actual finished pack.
Cover label dimensions, adhesive choice, placement, product-code association, damaged-label handling, and user messages in the pilot discussion. Add the repeat scenarios from the guide to copied QR codes and the operational gates from the product tracking system selection guide.
If you want to assess substrate, placement, and authentication as one journey, define an xBarkod pilot around one real package family. Make the release decision only after difficult and failed scenarios have produced a shared acceptance record.
Frequently Asked Questions
Can one security label work on every packaging surface?
No single construction produces the same result everywhere. Test the finished pack's material, coating, curvature, cleanliness, temperature, and use conditions, and follow the selected material supplier's technical application instructions.
Where should a security label be placed?
The location should cross the closure being protected without placing the QR on a fold, edge, crowded graphic, or severe curve. Required product information and other barcodes must remain visible, and a customer should be able to find the label easily.
Is a QR security label sufficient by itself?
A visible QR image can be copied. Depending on the risk model, the deployment may need a unique item record, concealed PIN, activation, repeat-use checks, and a workflow for reviewing suspicious activity.
How should a scratch-off PIN be tested?
The area should remain closed through distribution, open without damaging the pack, and leave the PIN legible. Test the digital result for an invalid PIN, a previously used code, and repeated attempts alongside the physical scratch action.
Is the label pilot only a manufacturing task?
No. Manufacturing validates application, quality owns acceptance, IT controls code status, the brand team evaluates the customer experience, and procurement confirms material and service scope. Combining those decisions in one record strengthens the release.
Should testing be repeated after a packaging change?
Yes. A change to substrate, varnish, colour, curvature, fold, print, or position may alter adhesion and scanning. The affected scenarios should be repeated instead of relying on an acceptance record for the previous pack.
Conclusion: Make the real pack fail before placing the full order
Successful security-label application comes from surface, placement, scanning, concealed data, line handling, and code management working on the same product. The pilot must show more than the happy path; it should reveal how the system behaves under mistakes and difficult conditions.
Base the final decision on acceptance evidence from the real package, not on the label name or unit price alone. The security label can then become a managed part of customer authentication and incident review instead of an isolated addition to manufacturing.
More Articles

Comparing Brand Protection Solutions: What Does Each Layer Do?
Compare legal, label, authentication, traceability, and case-management layers to select a brand protection solution through measurable pilot evidence.

What to Look for When Choosing a Product Tracking System: 10 Criteria
Compare identity, label, integration, security, reporting, and pilot criteria to choose a product tracking system that fits your real-world operation.

Product Authentication API Integration: A Go-Live Guide
Plan data flows, security, error handling, and acceptance tests for a product authentication API integration across ERP, production, and commerce systems.